Image by Leslie Carty from Flickr
No matter how much you try to ensure your car looks like it did when you rolled it off of the dealership’s lot, you’ll always be fighting time.
Whether you live up north and have to deal with rust and decay due to brutal winters, or overheating and similar issues that come from the hot and humid south of the country, there’s simply no preventing regular wear and tear.
And while your car may not run as perfectly as it may have when you purchased it, there’s tons of small detailing work you can do at home that can make your car look brand new. Car detailing is a large field with tons of different options you can pursue, both large and small.

Image from Pixabay
Depending on where your car is normally based, what sort of budget you’re working with, and what type of result you’re hoping for, you can buff out almost any aesthetic damage with a weekend and a little bit of elbow grease.
That’s why we’re going to be going over our fifteen detailing tips to make your car look brand new! We’ll also be discussing what goes into detailing—what you need to know before you start tackling certain makes and models, and how you can ensure that the work you put into your car this weekend lasts for years to come.
What is Car Detailing?
Before we get into what you need to know to get your car detailed right from your garage or shed, we’ll first get into what exactly it means to detail your car.Strictly speaking, car detailing is any work devoted to getting your car looking as good as it can. This includes:
- Removal of aesthetic and minor damage
- Waxing and washing the exterior of the car
- Vacuuming the interior
- Stain removal
- Glass cleaning
- Instrument dusting
- And more!
If you’re taking a car into a car detailer’s shop, you may not get just about every aspect of that above list. This is especially true when it comes to removing aesthetic damage or small dents, which may be considered extraneous work and subject to a surcharge by the detailing company.
You’ll want to call in advance and make sure that the detailing that you’re expecting from a company aligns with what they plan to do to your car. However, we’ll be focusing on the car detailing you can achieve at home instead of through a shop throughout the rest of our detailing tips.
Likewise, you have to consider that the materials that detailing shops use are often the same products that can be purchased at your local shop or on the internet. It’s widely reported that products are far less important to the finished product of a car than the application may be.
Which means that—with the right amount of effort on your end—you should be able to get your car cleaned up just as well as the pros.
The Basics of Car Detailing
Not sure where to start or never really worked on your car before? The first tips and tricks on our list deal with some of the simpler tasks you can work on to ensure that your car starts looking great without the learning curve.
Here’s how to get a clean car out of some basic home cleaning products and a few hours work:
Extensive Washing
Of course, we’ll need to start with a car that isn’t covered in dirt, soot, or other debris.
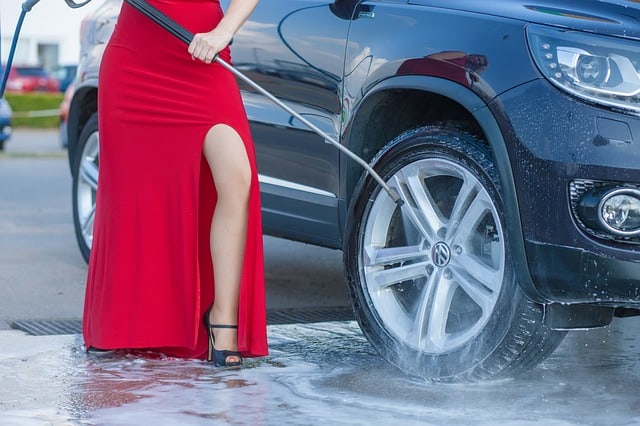
Image from Pixabay
You may be tempted to take your car into a car wash to ensure that your car starts clean, but don’t be so quick to head to your local automated stop. Many automotive experts recommend skipping the automatic car wash, which is said to brush dirt around and beat cars into submission with heavy brushes instead of providing the quick clean many perceive to give.
Which means that we’ll be washing our car back at home or manually at a local car wash.
No matter where you’re giving your car a wash, always remember to start with an opening rinse. If you move straight to soap from a dry car, all you’ll be doing is pushing dirt into and around the sensitive paint surface of your car—which can cause scratching and damage over the long-term.
With an opening rinse, you’ll be able to add soap onto the cleanest surface possible to make sure you’re rid of the worst of the offending dirt.
And on the subject of soap, we recommend opting for cash detergent over dish options. While you’ll often see it recommended that you take dish detergent to your car, the truth is, the oily nature of paint will require that you use a lighter soap.
Dish soap will only strip your car of the oils it needs and leave your paint worse off than when you found it, so an option specifically built for cars is crucial.
Finally, as for the application tool, a large soap sponge should do the trick. The idea is to lather the car and allow it to fully foam before removing the soap, so you’ll want to be more focused on coverage than bearing down on your car to get the soap in.
Polishing, Glazing & Waxing
While we’ve paired these next two basic steps together, remember that car waxing and car polishing are two entirely separate steps. You’ll need to make sure to polish before you wax, and take care never to confuse the two. Using polishing materials for waxing and vice versa can be disastrous for your car’s finish.

Image from Pixabay
When polishing your car, remember that the polishing job is designed to remove minor imperfections as well as the rest of the dirt and debris that may have been left behind during the washing process.
To effectively polish your car, all you need is a polishing agent and either a
Found light or long scratches that need to be taken care of? Polishing each issue for up to five minutes can ensure that you never have to deal with scratches again. We’ll get more into scratch removal a little bit later on, but for now, keep in mind that a great polisher can do much more work than you may suspect.
You may also want to consider using a glaze before moving into the waxing process, but after you’ve taken the time to polish. A good car glaze can bring shine back into your car’s paint and ensure that the waxing process is going to be able to bring out the best in your vehicle’s color.
Glazing is as simple as applying glaze to a polishing rag and conservatively rubbing it onto your car’s surface—being careful to remove the excess glaze from the outside of the vehicle. Much like with polishing and waxing, glazing is a slow and arduous process, so be careful to glaze in segments or prepare for some very sore forearms.
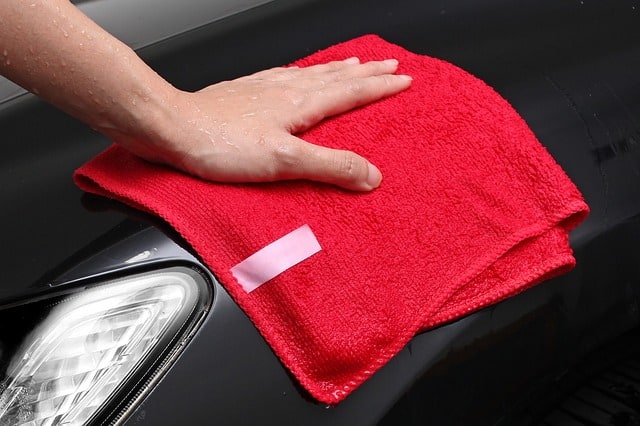
Image from Pixabay
Finally, you’ll need to keep an eye out for any missed spots, and possibly clean those up after removing most of the glaze using a spot treatment.
From amateur detailers to the most expensive shops, it’s very common to miss a spot when trying to treat an entire vehicle. Spending a little extra time to be sure of your work here will go a long way during the waxing process.
When it comes to waxing, most people consider this portion of the process of the most important (and most recognizable) when it comes to a car detail. And if you perform waxing correctly, it certainly can have the biggest overall effect on just how new your car looks at the end of the detailing process.If you’ve chosen to glaze and polish your car before the waxing process, be sure to wait a few hours or overnight to allow the car time to dry fully. You need a dry car, so any residual glaze left on needs to dry off before applying the wax.

Image from Amazon
Image from Amazon
When applying your wax, make sure to keep your car in a cool environment, perform the wax on a cloudy day, or otherwise make sure there’s no direct sunlight hitting your car. High heat can radically affect the way your car handles the wax, and since sunlight will never hit your car perfectly on all sides, you won’t want to risk a bad wax job.
Much like with polishing, a good towel is also crucial. A microfiber towel specifically designed for detailing cars should do the trick, but you’ll only want to use it for the end of the process. To apply the wax, consider getting a foam pad or soft rag for the job and apply a thin coat. Too thick of a coat, and you may end up with an uneven shine at the end of the day.
To remove the wax, pull out your microfiber towel and carefully buff out the wax. You may want to consider doing this portion (or even the application) in sections, as you can easily clog up your towel and wear out your arms performing this process.In either case, we recommend getting a bit of help if you’re aiming to detail your car on a deadline. Waxing has never been a quick and easy process.
Interior Detailing
We’ll have more tips and tricks specific to interior detailing later on, but for now, a basic interior detailing is going to prove more than useful if you’re hoping to accomplish a basic overall detail or just haven’t worked much in detailing before.
Much like with exterior detailing, interior detailing comprises of many different types of jobs.
Depending upon the types of fabrics, plastics, and carpets in your car, you may need to utilize several different types of cleaners.However, just like how we needed to wash the exterior of the car before going in for detailed work, we’ll need to get everything looking less dirty inside before going at it with products. Of course, we’re talking about vacuuming out your car.
For this process, it may be helpful to head to your local car wash and try out their vacuums. But regardless of if you get your vacuuming done at home or a local wash, make sure you get as much dirt out at you can. This often means getting on your hands and knees and getting under those seats.

Image from Pixabay
If you drive a car that’s got removable seats, it’s also recommended that you take as many seats out as possible. You’ll be able to more efficiently vacuum and get into those hard-to-reach areas that are so often saturated with dirt, mud, food crumbs, and other materials tracked into your car over the years.You’ll also want to take off any seat coverings or floor mats and clean these separately. Many car washes will have floor mat cleaners, which will beat much of the dirt out of your mats, but we recommend staying at home and running a vacuum cleaner over each mat specifically. The beater brush roll in many home vacuum cleaners makes for a great mat cleaner as well.
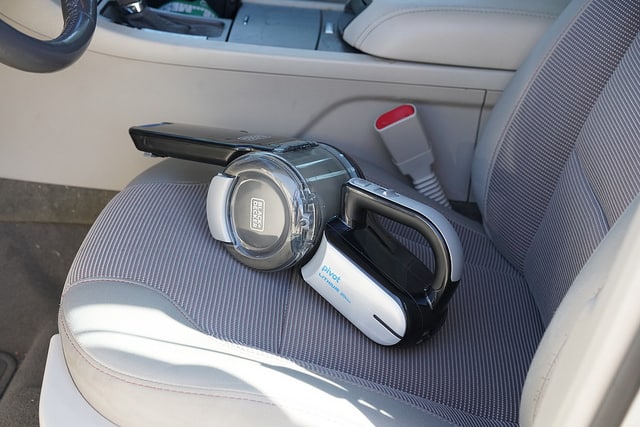
Image from Flickr, via Your Best Digs
Paying close attention to the details here is the most important aspect of your vacuuming. Did you consider cleaning between seats pressed together? How about the trunk? Did you get under the mat inside of the trunk?While a broad, heavy vacuuming will get you most of the way to a clean, new car, it’s that extra bit of effort that seems to do the most for a final presentation. And after vacuuming, of course, it’s time to get into cleaning the rest of your interior.
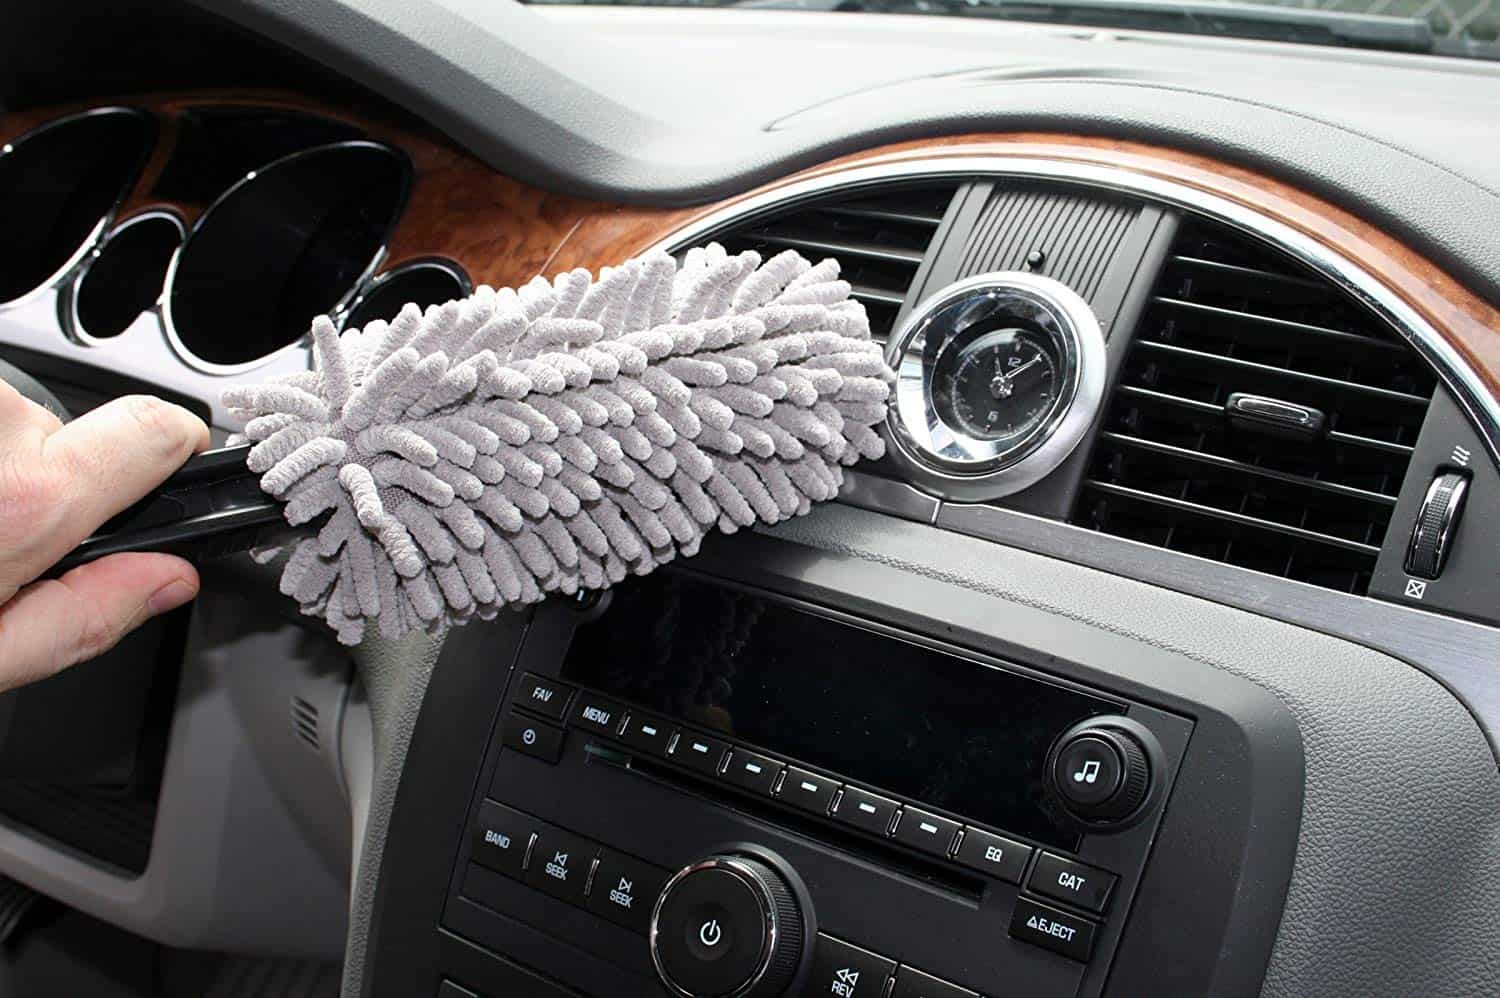
Image from Amazon
Just about everything inside of your car—from light stains on the dashboard to dried up soda in the cupholders—can have a bit of an odor. It’s not too uncommon to tackle the inside of your car, only to find a musty smell remains. That’s why it’s important to get an all-purpose cleaner for those plastics and get into those stains.
Get into your air vents, and make sure that there’s no dust to be had. If you need to, purchase a handheld air duster and get into those hard-to-reach places with ease. No matter what you do, the more detail and time you put here, the better you can expect your result will be.Got a stain? Get your stain remover out and get to work. Struggling to get dust, dandruff, and debris off of your seats? Grab your vacuum and use a brush attachment to pull at most seats without the threat of damage.
Much of interior detailing is intuitive, so the key is to trust your gut, make sure the product you’re using is safe for the material you’re using it on, and getting to work.
Cleaning Tight Spaces
Easily cleaning off your dashboard but struggling to get around the bezel and tight trim lines?

Image from Pxhere
It’s a common problem. While it may be aesthetically pleasing to build a car with such tight areas and lines, it’s another thing entirely to try to clean these areas out. No matter how much you rub or blast a region with an air duster, what you need is a fabric that can manually scrub into those areas.
Our fix? Snag a rag you don’t mind getting a bit stretched out and a thin (but blunt) screwdriver. Placing the rag over the screwdriver, you can force the fabric into tighter spaces without fear of leaving permanent scratches. You’ll also be able to pull out lots of dirt and debris in regions that previously seemed impossible.And if you’re still struggling to get the dirt out, make sure to spritz a little bit of cleaner onto the rag and problem area to ensure no dirt gets left behind.
Refinishing Wheels
This next detailing tip is going to take a full day’s work just on its own. However, if you’re working with a much older car, it may just be necessary to ensure your hard work everywhere else in the vehicle isn’t offset by a few rusty wheels.

Image from Pixabay
Wheels and wheel rims are generally some of the most overlooked aspects of a car detail, which is incredibly surprising given just how much they are seen when looking to your car. And while your hub cap might cover much of your wheel’s rim, most people can still spot rust if looking closely at an otherwise-detailed car.
If you’re getting tired of rusty rims and a rugged look on a sporty car, here’s what you need to do:
Step 1
Head to your local hardware store and pick up some primer and paint for the rims. Make sure not to use home paint, but paint specifically designed for rims. Also be sure to pick up a wire brush, if you don’t already have one, and remove your tires from your car for easier access to the rims.
Step 2
Now here’s a crucial step—remember to remove your wheel weights and mark their locations so that you can get them back in place once you’ve finished. You don’t want to take a wire brush to wheel weights, but you also don’t want to drive without them either, so this step is especially important.
Step 3
Next, take your wire brush and get to work removing the dirt and debris that may have caked on over the years. You can’t apply paint to a dirty surface, so even if you have to work with your wire brush by hand, be sure to put in a little bit of elbow grease here for some of the best results overall.
Step 4
Now, it’s almost time to paint. But before you start spraying your primer, you’ll need to protect the wheel itself from getting painted. This usually means pulling out some masking tape and (painstakingly) working your way around the rim. And while much of this day will end up being waiting for paint to dry, we won’t lie—this is one of the slowest portions of the job.
Step 5
Once you’ve covered your wheel with masking tape and some plastic sheeting, go ahead and hit your wheel with the primer. You’ll want to use multiple coats of primer and paint, depending on what your paint says to do. And for a bonus, we recommend picking up some clear coat as well.
Step 6
Once your work is done, all you need to do is wait for paint to dry. Rinse and repeat this process with the remainder of your wheels, and you should be left with a seriously great-looking wheel at the start of the next day. And if you wanted to, you could make sure you’re using hubcaps that cover less than the usual amount of your wheel to show off your handiwork.
Getting Out Rough Scratches
We talked a bit earlier on the importance of getting out scratches using a polishing agent, but a general polish of your entire car may not be enough to get the most egregious of scratches out of your hood, bumper, or roof. If you’ve got a few rough scratches, here’s our best approach for how to get them out.For this task, you’ll need high-grit sandpaper, rubbing compound, and a polishing rag.

Image from Amazon
First, take some sandpaper (preferably one with 3,000 grit or higher) and get it a bit wet to prevent leaving further scratches on the surface of your car. Next, take some time to get into the scratch and immediate surrounding area with the sandpaper. The ultimate goal here is to ensure the finish of your car looks dull.
The wider the area, the more easily we’ll be able to hide the scratch when we move into polishing. Once you felt you covered enough surface area, it’s time to get out the tools.
While you don’t always have to polish using a dedicated polisher, it may be helpful to retrofit your drill with a bit designed to hold polishing pads. That way, you can take much of the work away from your hands and have a little bit of energy for some of the later tasks you may need to complete.
Either way, get a little bit of rubbing compound onto your polishing pad as well as the surface of the car and get to work. Speed and energy are key here, so if you’re using a drill or polisher, aim for something over 1,000 RPM. This process will take much longer using your hands, so we recommend opting for the drill method here.In either case, you should be left with a hazy spot that you can then polish and wax alongside the rest of your car. Either spot polish next, or keep moving across the rest of your car to ensure you’ve got a scratch-free car. Once you learn the ropes and tackle your first few scratches, this task shouldn’t take you more than ten minutes.
Getting into Carpeting
Carpets in cars can be a bit difficult to clean out.Cars are often vacuumed far less often than homes when in reality, the constant dirt and debris that gets ground into fibers should require far more maintenance. And when you do get around to cleaning the carpeting in your car, you may find that your classic vacuum is either too big or too bulky to do the trick. What you need is a way to get that dirt out.
Our solution? Snag a heavy-bristled brush and a vacuum hose and get to work.One of the benefits of car carpeting over home carpeting is that the piling, or length of the fibers themselves, remains low. That’s why you can easily agitate the carpet fibers and release deep-seated dirt using little more than a brush.Take the brush into those hard-to-reach areas with the worst dirt and get to work—being mindful of your vacuum hose and quickly picking up what’s coming out before it falls back in.Depending on your upholstery, this may also be an effective method for cleaning seats. But in either case, this brush method isn’t going to do much for stain removal.
Stain Removal
Stain removal is going to look different for each type of surface. Most car owners will be familiar with the typical all-purpose spray and scrub method, which will effectively remove stains from plastics like on the dashboard. However, upholstery and carpeting is a different story entirely.
Image from Pixabay
If you’re working from home, you may want to utilize a portable spot cleaner or carpet cleaner. And if possible, try to seek one out that utilizes heated water to double your efforts.
To get started, hit the area affected with the stain with a stain removal spray that can be picked at your local home improvement store. Then, use your hot water to soak the area and lift the mixture using your handheld carpet cleaner. You may need to pull out your heavy-bristled brush from earlier to ensure you lift the stain from the fabric completely.
Are you still dealing with a smell afterward? Most people recommend blotting with baking soda and leaving for about a half hour. You should be left with fabric that’s looking new once again.
Are you dealing with a leather stain? The process for cleaning your leather upholstery is going to look a little different, and you’ll probably want to nourish the leather afterward for an added finish.First things first—to handle leather stains, you’re going to need cotton swabs and rubbing alcohol. Try to tackle these stains quickly—as time is of the essence when working with a leather stain.Rub the affected area diligently and remove as much of the stain as you can, before hitting the area with a blow dryer. Afterward, nourish the area using a mixture of white vinegar and indeed oil, or purchase an over-the-counter option at your local home improvement store.You’ll want to rub this mixture in for several minutes and allow to rest, before taking a soft cloth over to buff out the wetness. It’ll take a bit more work than you may have expected or was used to with carpeting, but when it comes to premium interior materials like leather, a little more attention will need to be paid to ensure you’re left with the best.
Dealing with Plastics and Vinyl
We’ve talked a bit about detailing on common surfaces like plastics, but what about when the all-purpose spray just isn’t doing it?If you’re working with some seriously aged plastics in your car, we recommend looking into a mildly abrasive soap, such as SEM soap, and a scuff pad.

Image from Maxpixel
There’s a fine line between really scrubbing into your plastics and leaving more scratches behind after cleaning than when you found it. Using a scuff pad and the right soap can help you make sure that you’re striking the right balance.
When tackling your plastics and vinyl, scrub emphatically and don’t be scared to get really into the process. You shouldn’t need to dampen your surfaces beforehand in most cases, but to be safe, you may want to take a wet rag to the areas beforehand to ensure the best possible clean.
After you’ve effectively scrubbed your plastics—taking care to get into those recessed nooks and crannies—take a clean rag and wipe off the excess dirt and debris that may have been left behind. Allow to air dry, and use a scent behind for an effective finish.
Finishing Touches
Now that we’ve handled the basics of detailing and are getting more and more effective at solving problem areas, we’ll need to finish off our detail with some great finishing touches to give our car that showroom finish we’re hoping for.
Here are our final tips on those crucial final tasks:
- Investing in Protectant
Remember how we took the time to scrub into vinyl and plastics?
If you want to protect your time and investment, try looking into a matte protectant.
While you may be tempted to purchase a shiny finishing spray for the interior of your car, the truth is, these sorts of spray can make your car a magnet for even more dirt and debris over time.
That’s why we recommend a matte protectant instead. These can be purchased at your local hardware store and help to preserve all of the hard work you’ve put into the interior of your car.
- Fixing Squeaky Doors
Nothing is stranger than a new-looking car sounding like one far older.It’s a minor, almost aesthetic problem to have, but when finishing your car, you may want to finally handle that squeaky door of yours. And like with most other issues, this one can be solved with just a little bit of WD-40.Get into door hinges as well as hood and trunk hinges with a bit of WD-40—being mindful to wipe off any excess so that you don’t pose damage to finished paint. And if you live in a coastal environment, you may want to perform this process regularly to keep joints moving fluidly.One of the more commonly forgotten regions to hit up is the gas tank lid. Douse this area liberally as well.
- Glass Cleaning
Ever struggle to clean your windows, only to find that a streak has been left and you’re not sure which side of the glass it’s on?Of course, finishing with a glass cleaning is important—but it’s almost more important that you take the time to clean efficiently.The best way to clean your glass without struggling to find where the streak’s been left is to clean in opposite directions. Try wiping up and down on the outside of your window and left to right on the inside. That way, you can locate the streak, remove it, and get back to your other tasks.
- A Microfiber Finish
Our very last tip is one we’ve been referencing time and time again throughout our list—and that’s utilizing a microfiber towel.
While you may have used this towel to clean up after a polish or wax, when it comes to finishing off your detailing work, why not use a fresh option? Having a nice, high-quality finishing towel can help you perform the final wipe-down. And who knows?
It may also double as a great sweat rag, as you wipe your brow and look to the car you’ve spent so much time working to look as great as it can.
We hope these tips and tricks have helped inspired you to get out to the garage and get to work on your car. Detailing isn’t easy, or fast, but provided you put in the work and work diligently enough, the results speak for themselves.

